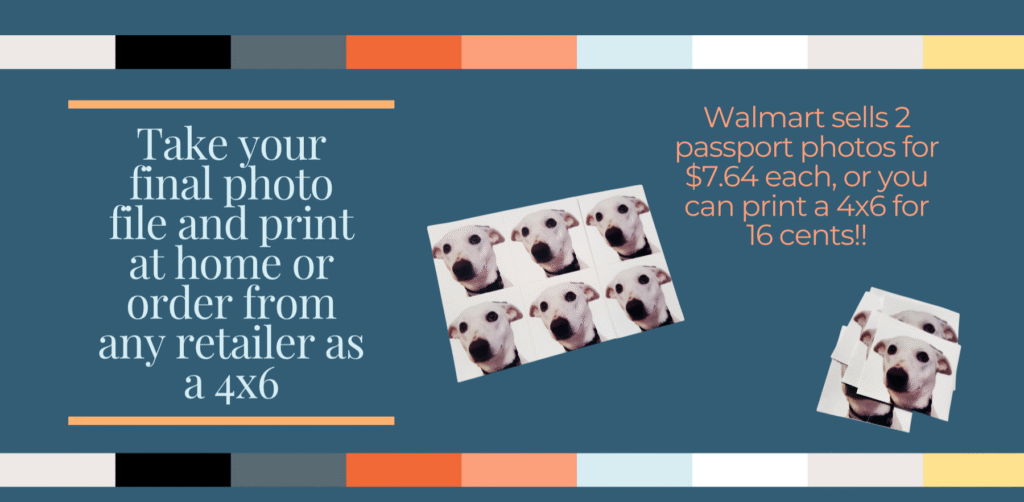
It’s hard to believe that big retailers like Walmart and CVS can charge over $7.50 for a pair of passport photos, especially when a standard 4×6 print costs just 16 cents. Well, here is how to hack the system to print passport photos for just 3 cents each.
We use passport photos all the time in expat life, whether it’s passport renewals, visa applications, government forms, or unexpected paperwork that requires pictures. With this simple hack we keep up-to-date passport photos for all six of us always ready to go. I’ve written the whole process out here with links to my favorite resources.
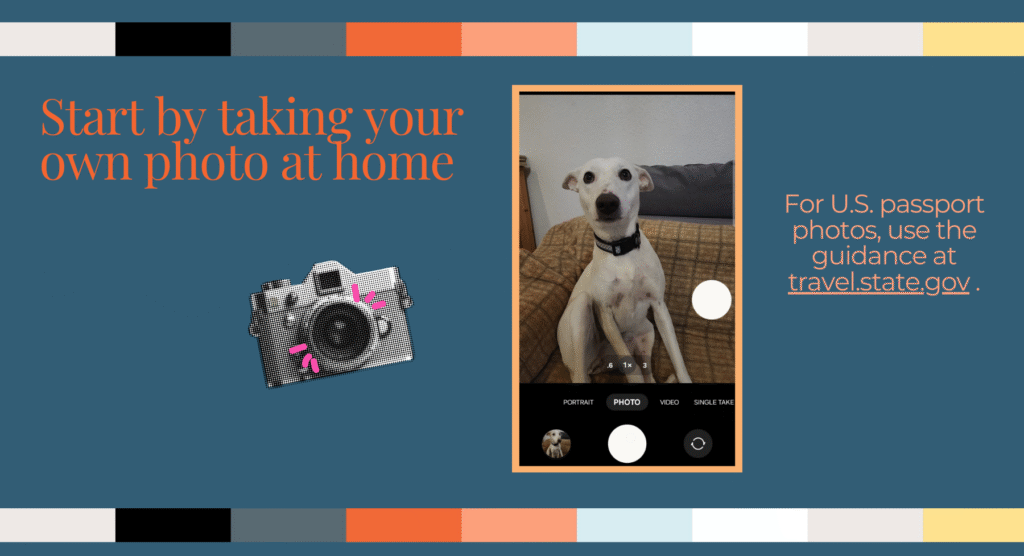
STEP 1: Take Your Own Passport Photo at Home
This may seem intimidating, but all of the guidance is straightforward. Each country will have different requirements, but they are usually clearly listed (more on this in a moment if you don’t know where to start for your country). For the U.S., the information is here on the State Department website.
Ideally, take the picture against a plain, light-colored background. Don’t worry if it’s not perfect—you can fix it later with a background removal tool.
- Pro Tip for Babies: For kids who cannot yet stand (or won’t stand still), a great trick is to lay them on the floor or in a car seat with a white blanket underneath. Use a rattle or make silly voices to get their attention and capture the perfect shot.
STEP 2: Use a Background Removal Tool
If your photo does not have a plain white background, use a tool to make it white and shadow-free. I use canva‘s background removal feature, but many smartphones also have a built-in lasso tool that will also work. Skip this step if your photo already has a white background.

STEP 3: Crop and Format Your Photo
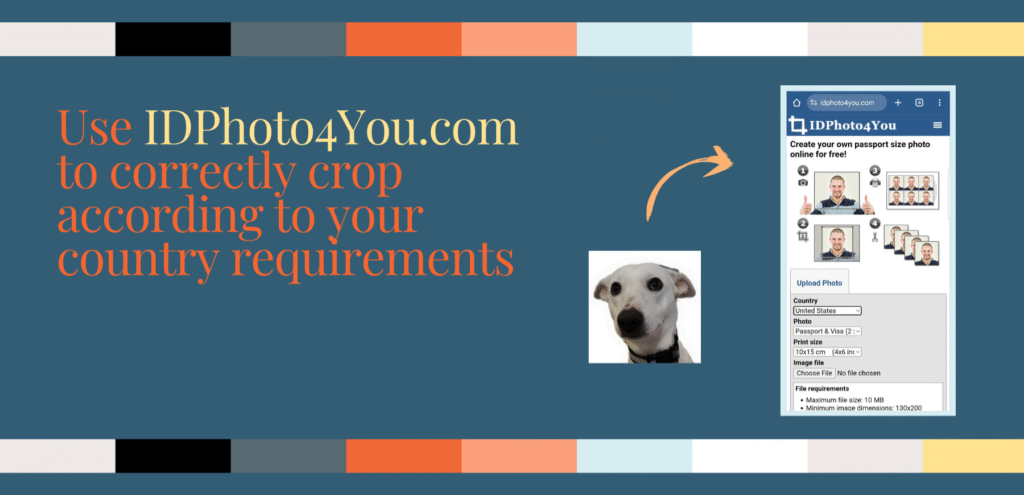
This is where the magic happens. A great resource is the ID4You website, which has the passport photo requirements for over 70 countries preloaded into its editing tool.
- Simply select your country and the print size you want.
- Upload your photo and crop it using their on-screen tool.
- You can then download a final file formatted for printing.
For the U.S. requirements, I prefer a different method to get six prints per page:
- Crop the photo to a square shape directly on your phone
- Use a collage app to create a 4×6 photo with six headshots (with ID4You will create a 4×6 with only four photos). Note that I couldn’t get Google Photo to work for this as it doesn’t allow you to select a 4×6 ratio.
- Select the same photo six times – just keep clicking on the same photo until you have six. Or you will need six copies of the same photo.
- Edit the ratio to a custom dimension of 4×6
- Select the correct grid to make each photo a square.
- Download the 4×6 photo file for free, right on your phone.
My favorite app for this is Collage Maker (available on Android, and you can find similar apps in the Apple App Store, like this one).

STEP 4: Print at a Retailer or at Home
You now have a 4×6 photo file ready for printing. In Europe this is also a 10x15cm size print. Since standard-size prints are so much cheaper than using a special passport photo service, you can take your file to any retailer (like CVS, Walmart, or a local photo shop) or even print it at home on photo paper.
Enjoy your cheap and easy passport photos!